As a tech enthusiast with years of hands-on experience optimizing streaming devices, I've tested numerous ways to capture what's on your Amazon Fire TV Stick screen. While it lacks a built-in screenshot tool, these two proven third-party methods work seamlessly.
1. Use an App to Capture Screenshots on Your Amazon Fire TV Stick
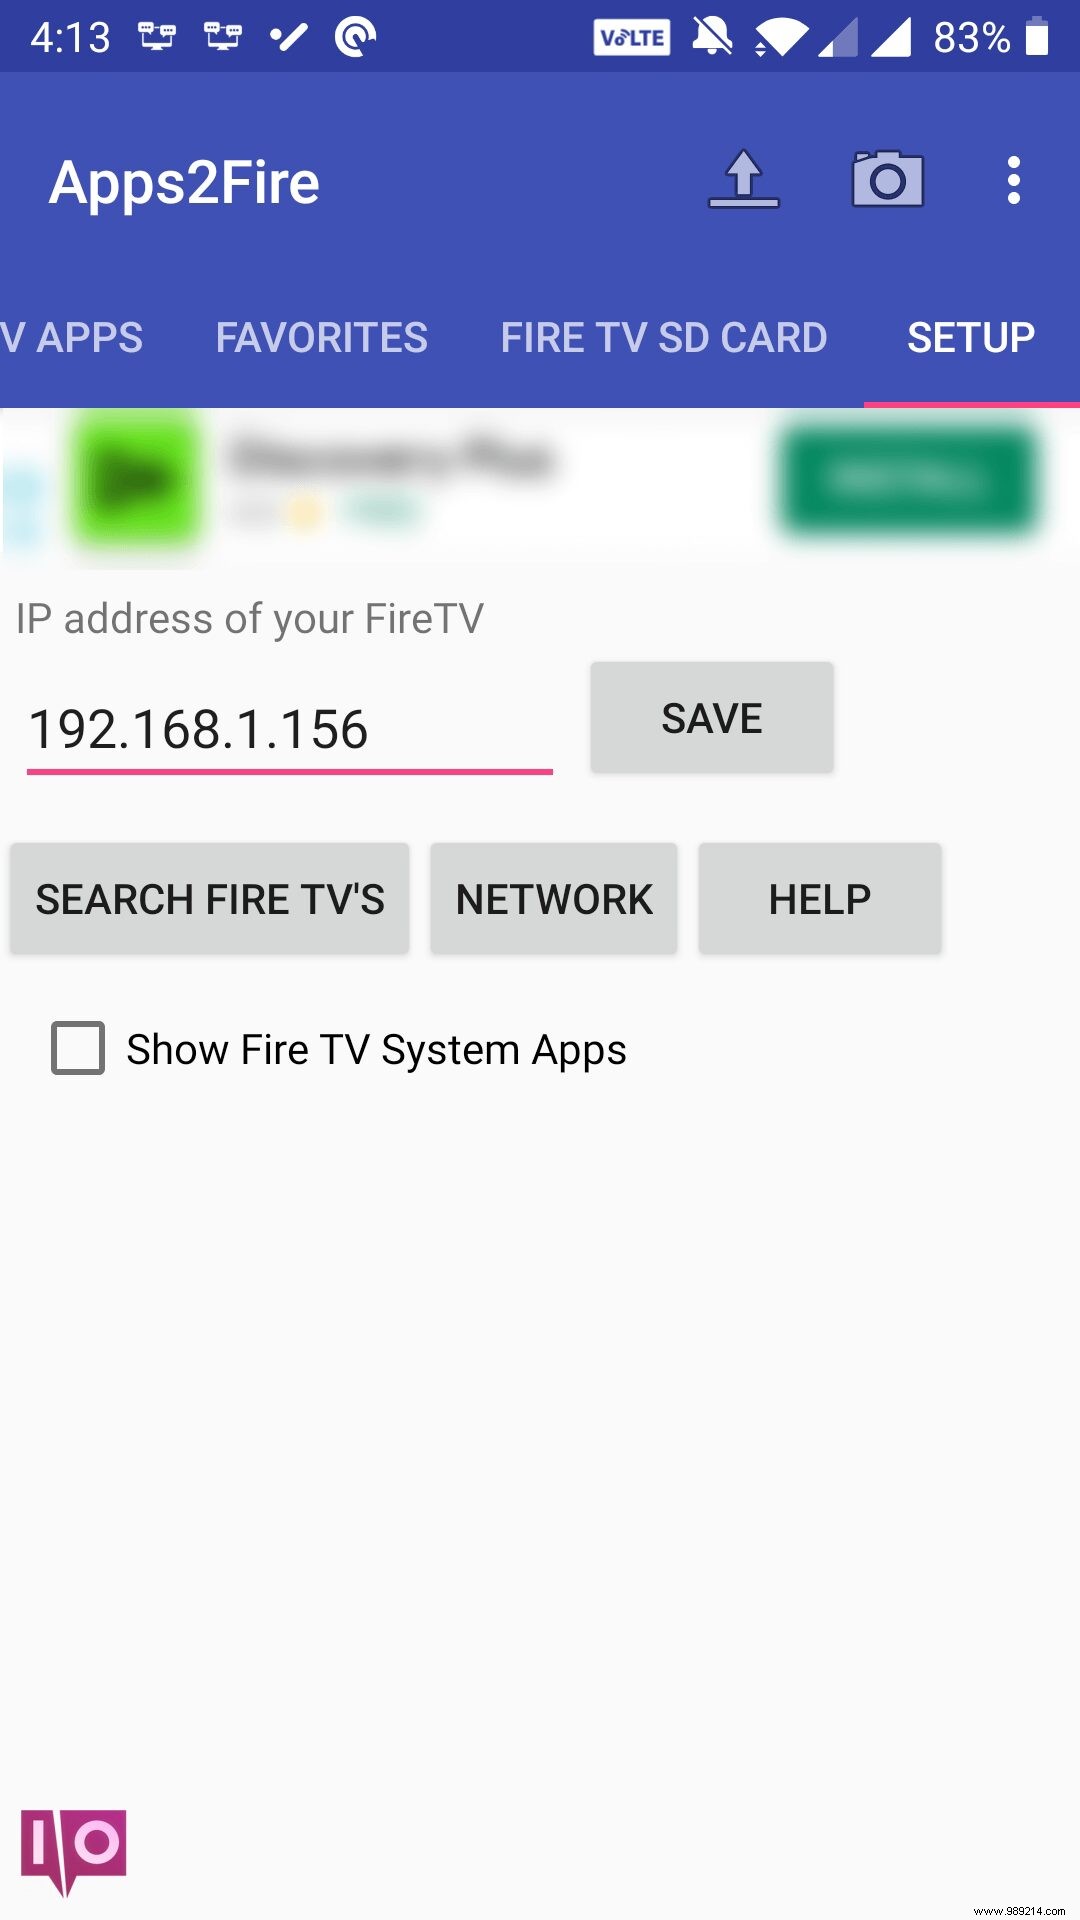
For Android users, Apps2Fire connects via Wi-Fi for one-click screenshots after initial setup.
Fire Stick Setup for Screenshots
- Open Settings > My Fire TV.
- Select About, highlight Network, and note the IP address.

- Press Back, then select Developer Options.
- Enable ADB Debugging.

Taking Screenshots
- Install free Apps2Fire on your Android phone.
- Tap the three-dot menu > Install.
- Enter the Fire Stick's IP and tap Save.
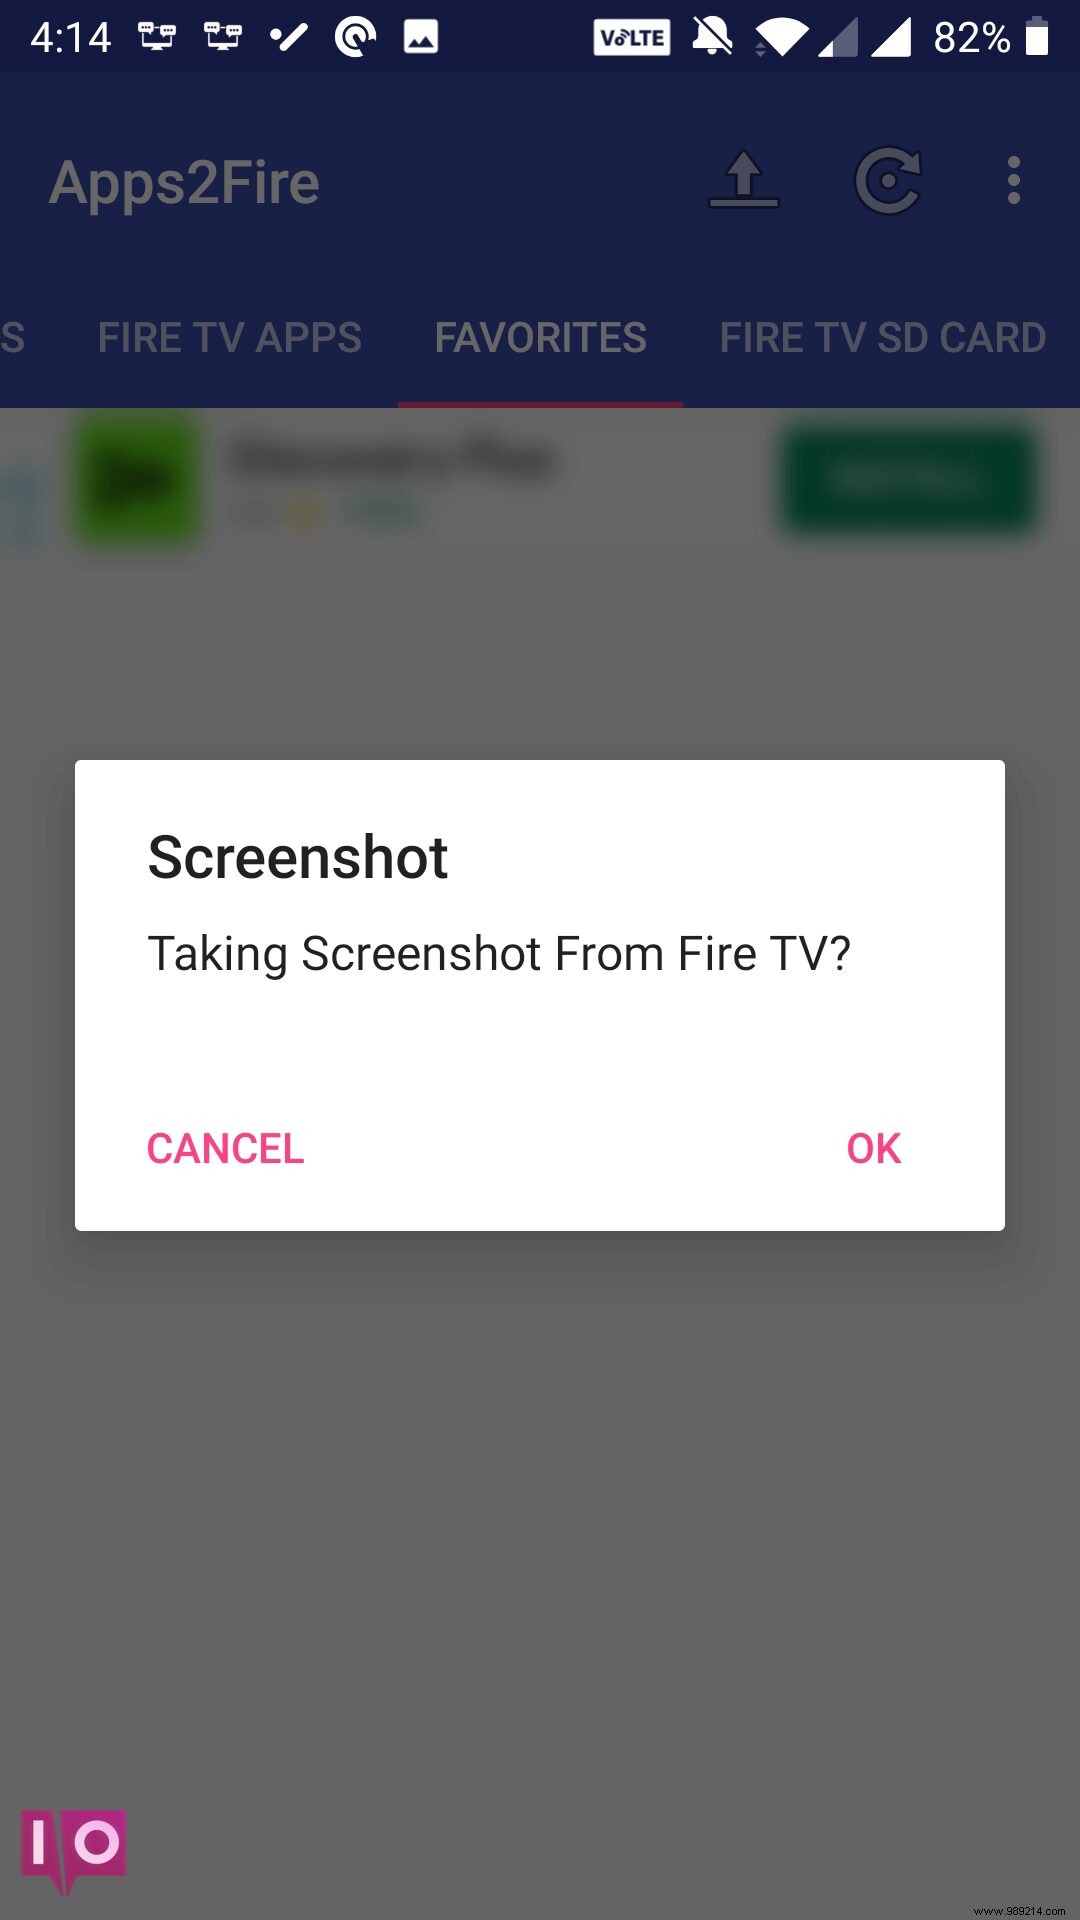
- Confirm connection.
- Menu > Screenshot > OK.
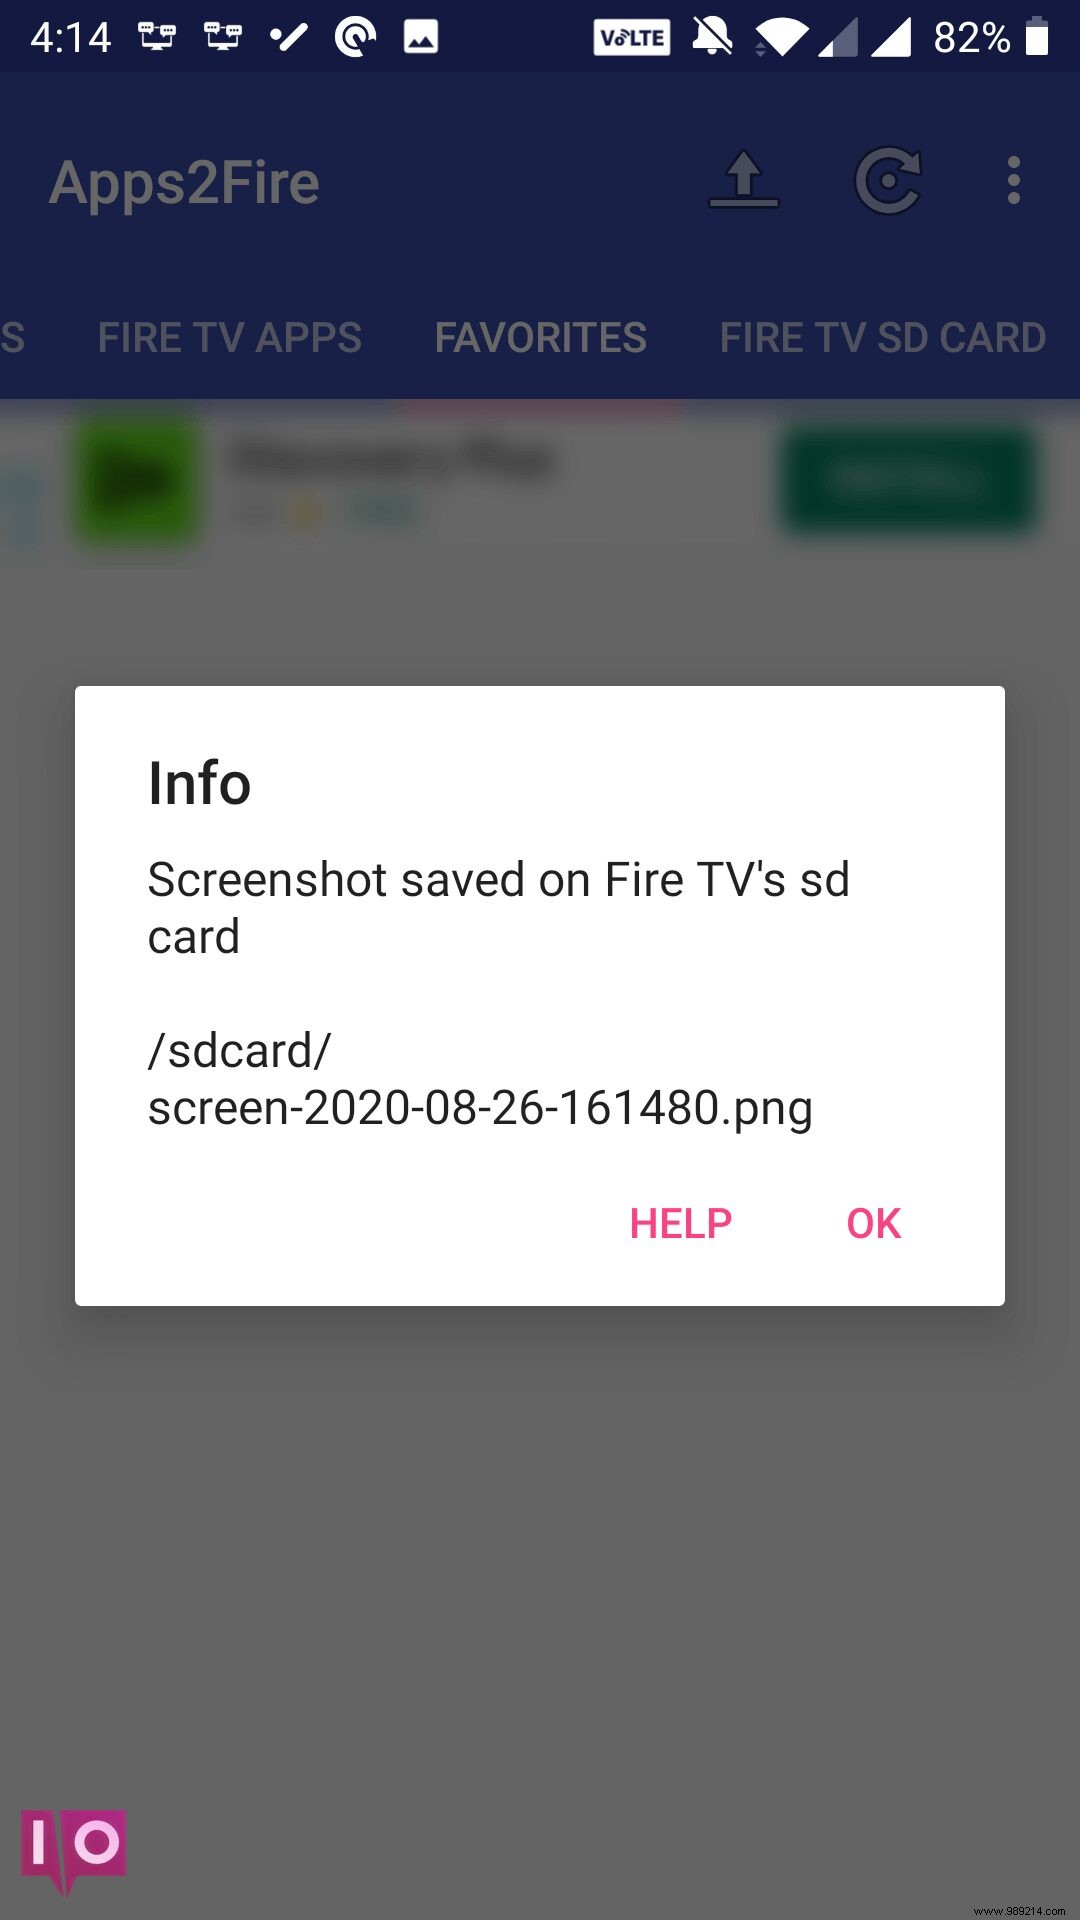
- Note the filename shown, then OK.
- In the app, select Fire TV SD card, locate the file.
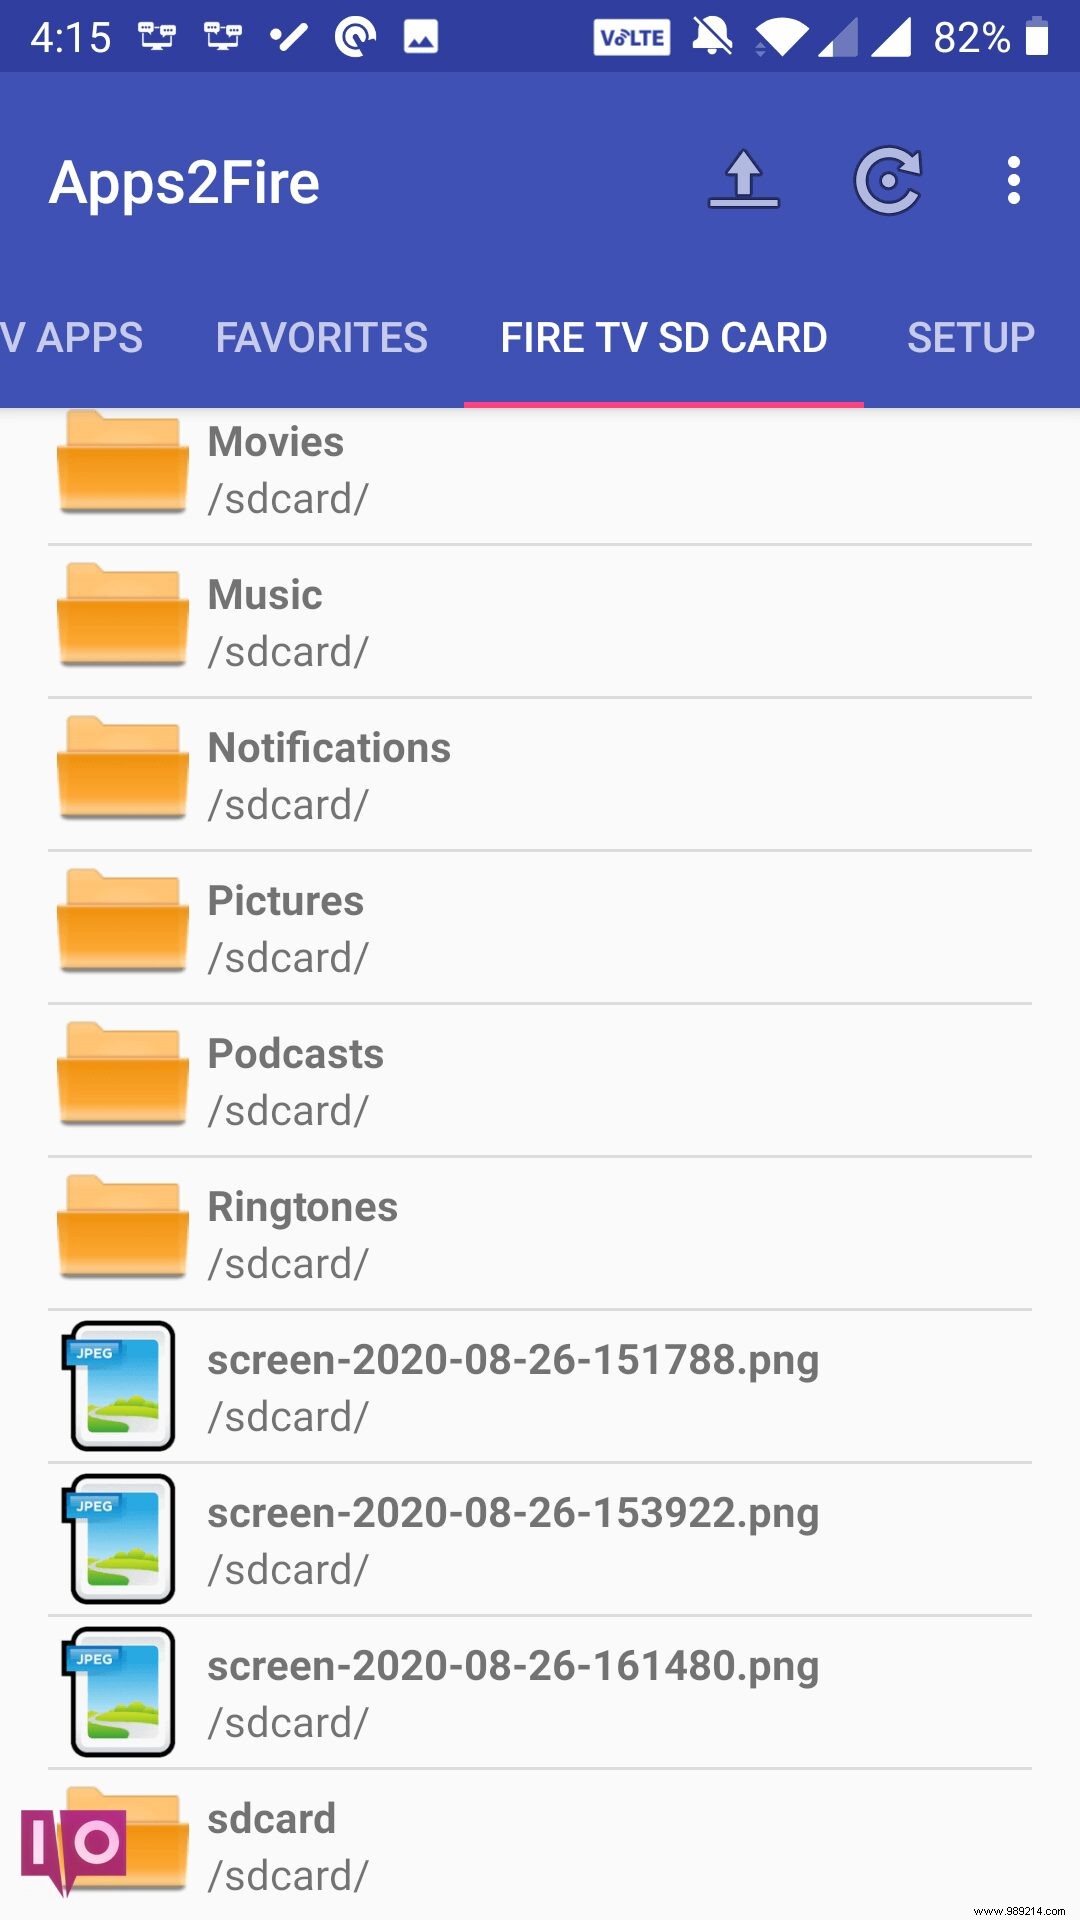
- Tap the file > Download.
- Find it in your phone's Downloads folder (use a file browser if needed).
2. Use ADB for Screenshots on Computer
For computers or non-Android setups, Android Debug Bridge (ADB) provides command-line control. I've relied on this for years in troubleshooting Fire devices.
- Note IP: Settings > My Fire TV > About > Network.
- Enable ADB Debugging in Developer Options.
- Download and extract ADB Platform Tools.
- Open command prompt in the ADB folder (Shift + right-click > Open command window here or type cmd in address bar).
- Connect: adb connect [IP].

- Accept on Fire Stick.
- Capture: adb shell screencap -p /sdcard/image.png.

- Pull: adb pull /sdcard/image.png.

- Screenshot is now in your ADB folder.
Capture Fire Stick Screenshots Effortlessly
These methods bypass the lack of native support, delivering reliable results. For advanced customization, consider jailbreaking to unlock more features—always from trusted sources.
